Note: Throughout this installation and configuration process, Websphere will prompt you to Click Save to apply changes to Master Configuration. Do so intermittently to save your changes.
Download Liferay Portal Professional 4.1.0 WAR , unzip and compile.
Install IBM Websphere.
Install MySql.
Download and extract these liferay jars to websphere\appserver\lib\ext.
portal-kernel.jar and portlet.jar (Liferay Portal 4.1.1 Dependencies)
liferay-portal-jaas.jar (Liferay Portal Enterprise 4.1.1 JAAS Libraries)
portal-ear\mysql-connector-java-3.x.x-bin.jar (MySQL)
Start Websphere.
Open Adminstrative Console and login.
Click Resources, click JDBC Providers.
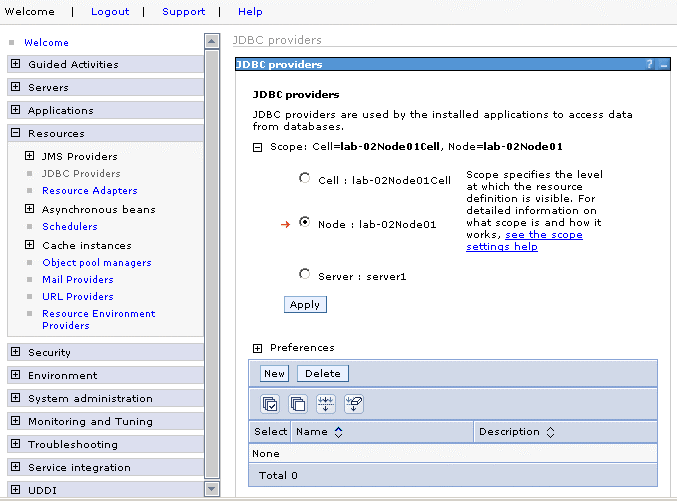
Click Next.
For name, enter name of jdbc provider, e.g. liferayjdbc.
Clear any text in classpath.
For Implementation class name enter
com.mysql.jdbc.jdbc2.optional.MysqlConnectionPoolDataSource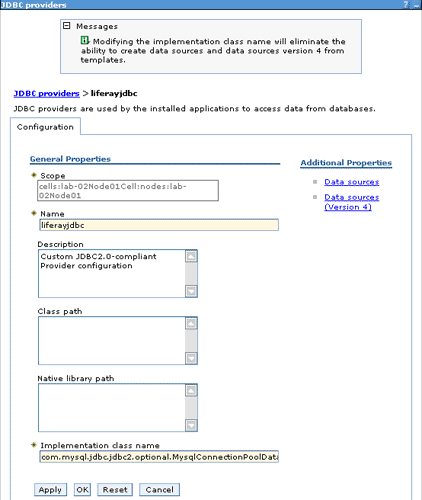
Click OK.
Click Data sources under Additional Properties.
Click New.
Enter a name: liferaydatabasesource.
Enter JNDI, jdbc/LiferayPool.
Everything else should stay to default.
Click OK.

Under Additional Properties, click Custom properties.
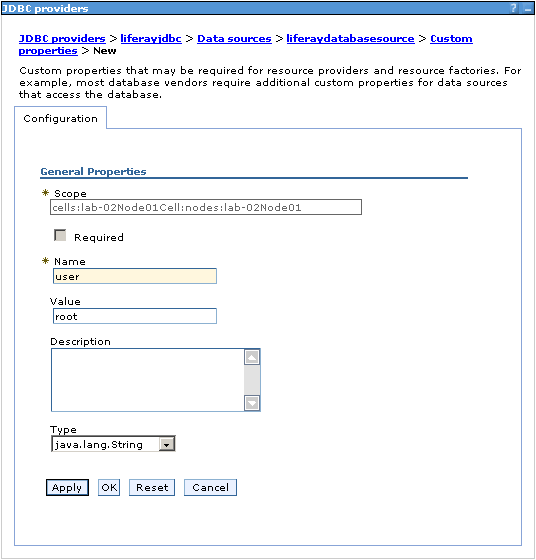
Click New.
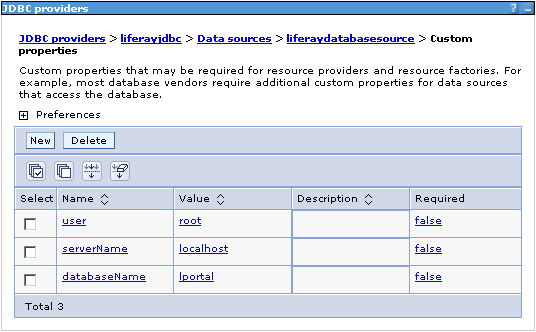
Create 3 custom properties by entering Name, Value and clicking OK for each row on this table.
When done correctly, custom properties should look like this:
Download Liferay Portal 4.1.0 SQL Scripts and extract
create-mysql.sql.In command prompt, run mysql script by entering
mysql < trunk\sql\create\create-mysql.sqlClick data sources test connection to test.
Click Resources, Mail providers.
Click Built-in Mail Provider.
Click Mail Sessions.
Click New.
Name: liferaymail
JNDI name: mail/MailSession
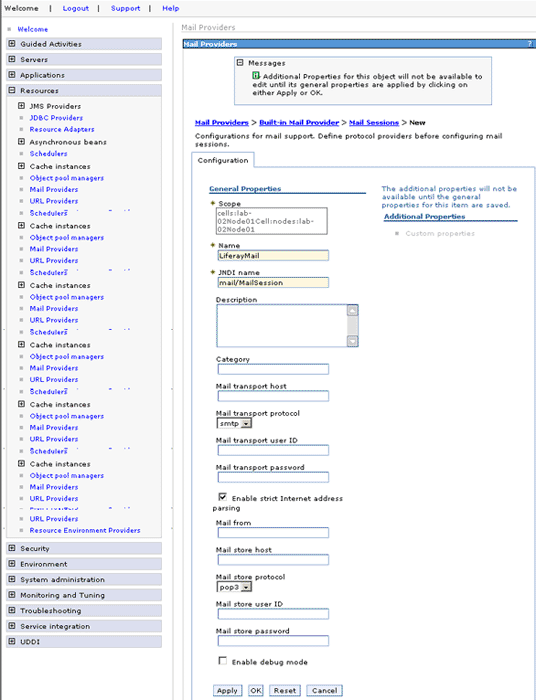
Click OK.
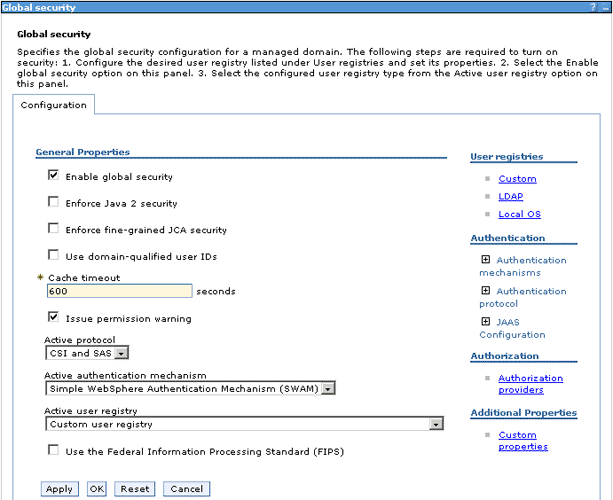
Click Security.
Click Global security.
Select Enable global security.
Deselect enforce java 2 security.
In Active user registry, select custom user registry.
Click Apply to go to Custom user registry page.
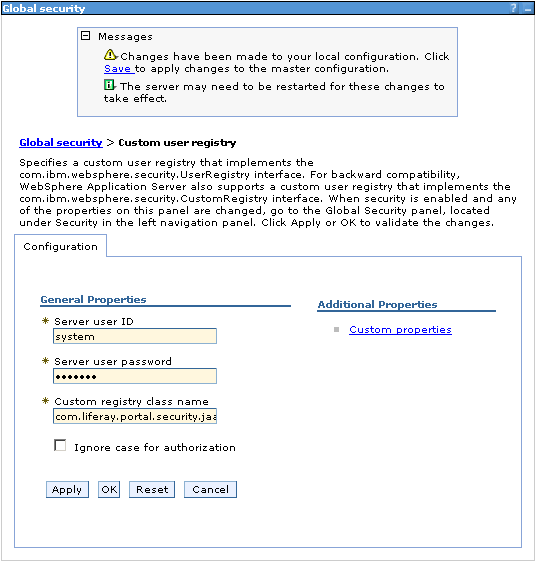
Enter 'system' for server user ID.
Enter 'password' for server user password.
Enter Custom registry class name
com.liferay.portal.security.jaas.ext.websphere.PortalUserRegistry.Click Apply.
Insert username/password into database.
Open a mysql console.
Enter
Use lportalEnter
Insert intoUser_ (companyId, userId, password_) values ('system', 'system', 'password');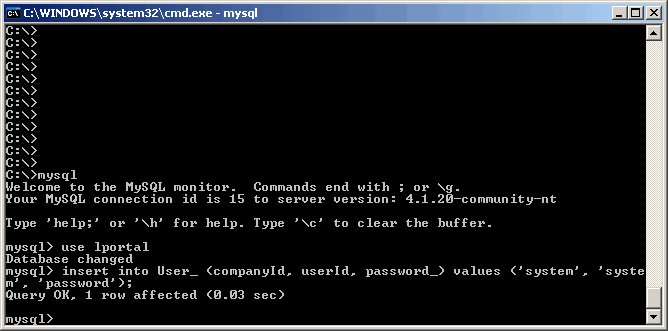
Click Applications, click Install new applications
Browse for portal-ear\liferay-portal.war.
Enter context root '/'.
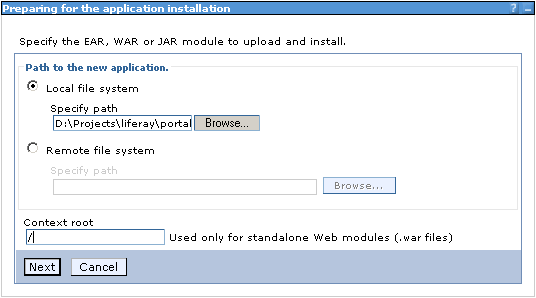
Click Next
Select Generate Default Bindings>Override default bindings>Use default viral host name for web modules:
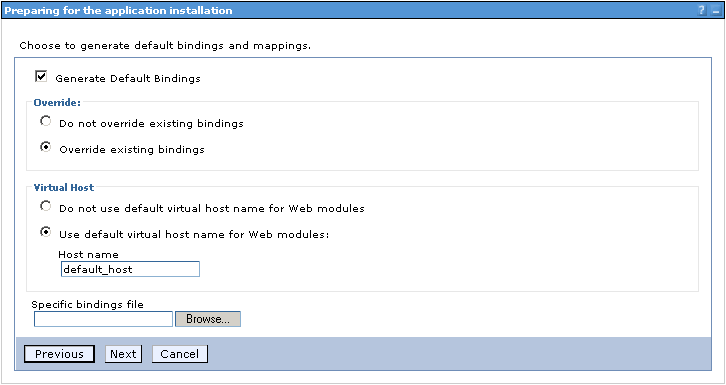
Click Next. Click Continue. For Steps 1 to 4, click Next to apply defaults.
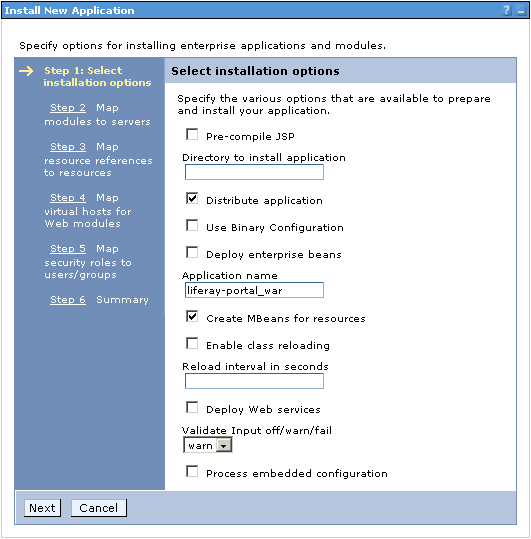
In Step 5, check all authenticated.
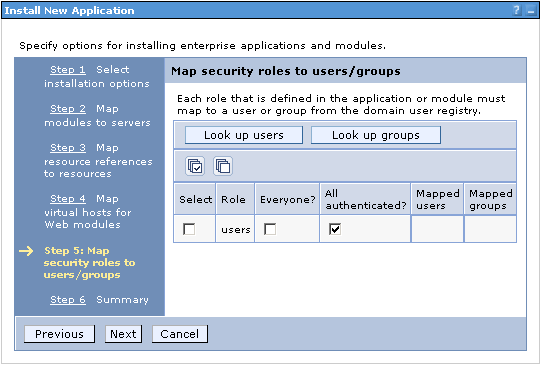
Click Next.
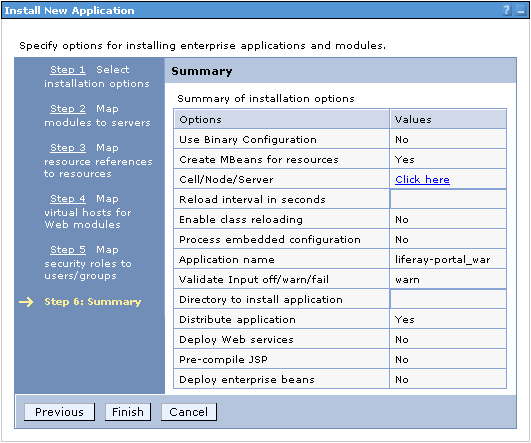
Click Finish.
Wait for installation process.
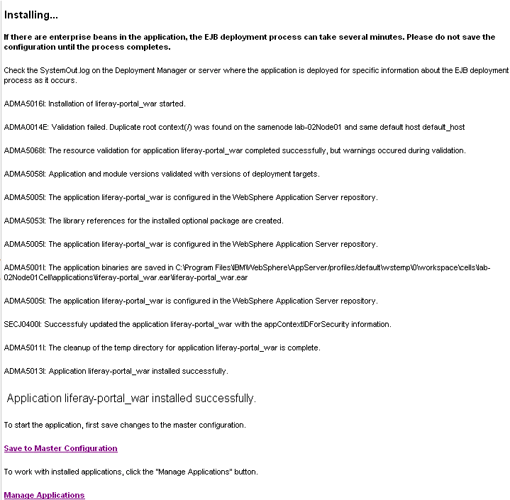
Save this configuration to master configuration by clicking on System administration and Save Changes to Master Repository.
Applications.
Click Enterprise Applications.
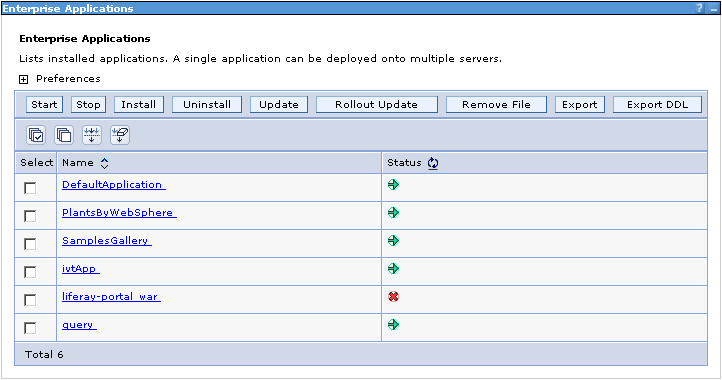
Uninstall DefaultApplication, PlantsByWebSphere and SamplesGallery.
Select liferay-portal.war, click start
Open up browser and point to http://localhost:9080. Liferay portal home page should be seen.
Edit your Stop the Server shortcut to set the user id and password. If you don't do this, you will not be able to stop the server after you restart WebSphere:
"C:\Program Files\WebSphere\AppServer\bin\stopServer.bat" server1 -user system -password passwordStop Websphere and retart it. Login on with 'system' for username and 'password' for password.