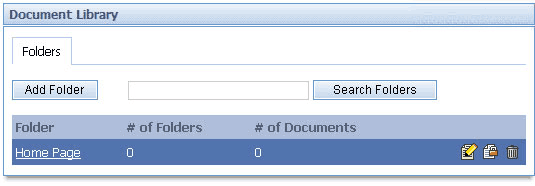
The Document Library provides a centralized repository for various documents (e.g., .PDF, .DOC, .XLS, etc.) to be stored and given a unique URL. A company's intranet running Liferay's portal software can then be able to post internal documentation (e.g., reimbursement forms, charitable donations policies, etc.) for access by its employees. Alternatively, since each document has its own URL, a portlet on your company's public website may display a list of PDF files of quarterly newsletters and their download links:

The Document Library supports multiple repositories that can be set with different access roles. Also, the documents in the repository are version-controlled, allowing a user to retrieve any particular revision that has been stored on the system.
To add a document to an empty Document Library portlet, you must first add a folder. Click the Add Folder button.

Give a name and description to the folder. The permissions for the folder determine what users can do. This is further explained in the Permissions Users Guide. Click Save. The Document Library screen will appear.

The new folder will appear in the Document Library. To add a document to that folder, click on the folder name.

Here you can either add more folders to further divide your documents into more specific categories or you can add a document to the current folder. The breadcrumb (see section 5.1.) at the top of the portlet shows that you would be adding a document to the Home Page folder. In this use case, we will add a document. Click Add Document.

Use the Browse button to find the document you want to upload to the Document Library. There is a cap of 300k on uploaded documents. After uploading the document, enter a title and description for the document. Click Save when finished. After saving, you can choose to lock the document to prevent anyone from editing this document. The default lock time is one day.

Use the breadcrumb to return to the Home Page folder (for this use case) where you will see the document you have just added. Clicking on the document will allow you to open or save it. If you have the proper permissions, you can delete the document from the Document Library by clicking the Delete icon (
 ).
).
To reference a document in the Document Library, you must first find which folder the document is contained in. Using the same use case as in 2.1.1, we see that the W-4.pdf document is located in the Home Page folder, as shown by the breadcrumb.

Right click on the document name, then select Properties to view its Address (URL). You can then either highlight the entire URL or click anywhere over the URL area and press Ctrl+A to select the entire link. Keep in mind that the URL is long. If you use the highlight method, you must hightlight the entire URL. You can then copy this link and reference it anywhere within the portal. You can even reference this document outside of the portal as long as your portal is running and the document is still in the repository. Refer to figure below.

Like the Document Library, the Image Gallery provides a central repository for images used throughout the Liferay Portal by a unique URL. The arrow image ( ) can be found throughout Liferay's website as a navigation icon.

Each instance uses the same uniqueURL: @root_path@/image/image_gallery?img_id=15.
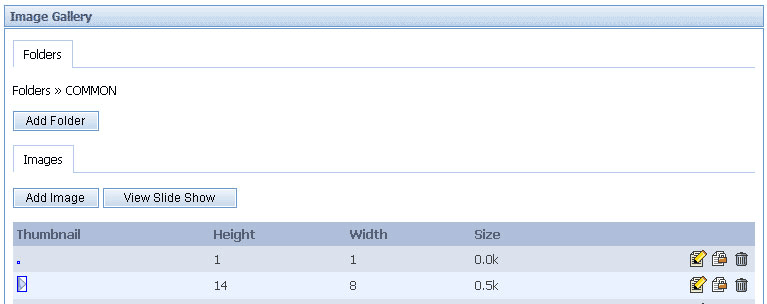
To add an image to the Image Gallery portlet, first add a folder by clicking the Add Folder button. This is similar to adding a folder to the Document Library, described in Section 2.1.1. This use case will show an Image Gallery with three folders already created: COMMON, HOME-INDEX, and PRODUCTS-LIFERAY.

We will now add an image to the COMMON folder. Clicking on COMMON takes you to the folder view. Click on Add Image to add a new image.

Here we add the image by pressing the Browse button and selecting the image to upload. Keep in mind that image size can be no larger than 300k. Give an easily identifiable description for the image, and then click Save.

After saving, you are returned to the folder in which you saved it in. As can be seen by the breadcrumb, the COMMON folder is displayed in the figure below. You can position your cursor over the image for a description, and click on the image for a full-size view.

To reference an image in the Image Gallery, you must first find which folder the image is contained in. Using the same use case as in 2.2.1, we see that our image is located in the COMMON folder, as shown by the breadcrumb.

Click on the Edit icon (
 ) to view the properties of the image. The URL is highlighted in the picture below. To reference this image in Journal Templates in this use case, you would type in @root_path@/image/image_gallery?img_id=43. Templates are described more completely in section 3.2.
You can view all the images from a folder in a slideshow. To view the slideshow, click on the View Slide Show button in the folder you want to view.

A new window will appear showing a full-size image and a set of commands. It will repeatedly scroll through the images inside the folder chosen. To view images at your own pace, press Pause and press the Next or Previous buttons to change images. There is also a speed setting from 1 through 10, with 1 being the fastest and 10 the slowest. Press Play to resume the slideshow at the chosen speed.
