1.0
Copyright © 2000, 2007 Liferay Inc.
| Revision History | |
|---|---|
| Revision 1.0 | December 20th, 2006 |
Table of Contents
Intended audience. This document is intended for developers that want to develop portlets that will be deployed in Liferay Portal. As Liferay supports the portlet specification (JSR-168), any portlet developed according to that standard will work.
Liferay version. This guide has been written for Liferay 4. Some details might be different for previous versions. Do not expect it to be accurate for even older versions.
Related documents. If this is not what you are looking for consider the following related documents
Liferay Portal 4 - Customization Guide
Liferay Portal 4 - Portal Users Guide
Liferay Portal 4 - Development in the Extension Environment
More information and support. If you are looking for help for a specific issue we invite you to use our community forums: http://www.liferay.com/web/guest/devzone/forums to ask your questions. We also offer professional support services (support@liferay.com) where your company will be assigned a Liferay developer ensuring your questions are answered promptly so that your project is never compromised. Purchased support always gets first priority. This business model allows us to build a company that can contribute a great portal to the open source community. If your company uses Liferay, please consider purchasing support. Liferay has an extremely liberal license model (MIT, very similar to Apache and BSD), which means you can rebundle Liferay, rename it, and sell it under your name. We believe free means you can do whatever you want with it. Our only source of revenue is from professional support and consulting.
Table of Contents
This guide covers the Liferay specific deployment description and explains the tools, additional features and services that Liferay Portal offers to developers of portlets. A portlet is a web application that follows a set of conventions that allow portals to manage its lifecycle and integrate them with other portlets.
The following sections provide an introduction to the development of portlets and the environment recommended for this task.
Developing a Java Portlet is similar to the process of developing a Servlet based web applications. The main differences are:
The portlet only produces a fragment of the final HTML and not the full markup. The portal will join the fragments of several portlets and will create the full page returned to the user.
The class receiving the requests has to inherit from javax.portlet.Portlet instead of javax.servlet.http.HttpServlet.
A portlet request may involve a two phase process:
On each request at most one portlet will be able to
perform an state-changing operation. This is referred to as the
Action phase and is implemented through a method called
processAction. Not always an action phase is
needed. Requests that involved an action phase are invoked to an
URL known as an ActionURL, while those that only have a render
phase are invoked through a RenderURL.
Next is the render phase where all other portlets related
to the page that is going to be returned may be called in any
order to produce the HTML fragment to draw themselves. Portlet
implement this functionality through a method called
render.
Existing web application development frameworks such as Struts, JSF, Webworks, etc can be used through the use of Bridges. Other existing frameworks have been adapted to be usable directly without the need of a bridge. An example is the Spring Portlet MVC framework.
A portlet container is a server side software component that is capable of running portlets. A portal is a web application that includes a portlet container and may offer additional services to the user. Liferay Portal includes its own portlet container and offers lots of functionalities such as user and organization administration, creation of virtual communities, having pages based on portlet layouts, graphical selection of portlets and drag&drop to place them, grouping pages into websites, several bundled ready-to-use portlets, and much more.
The Java platform provides an standard referred to as JSR-168 that standarizes how portlets interact with portlet containers and ensures compatibility across different portal products as long as portlet adheres to the standard. Liferay Portal provides a 100% compatible portlet container that guarantees that any portlet that adheres to the standard specification will be able to run within Liferay.
In JSR-168 a portlet application may aggregate several different
portlets and is packed in a WAR file just as a standard Java web
application. The portlets of the application are defined in a file
called portlet.xml that is placed in the
WEB-INF directory inside the WAR file. This file
can be seen as an extension to the web.xml defined in the Java Servlet
Specification. The Java Portlet specification allows portlet
containers
For more information related to JSR-168 it is recommended to read the specification itself. Also several articles introducing development of JSR-168 portlets and explaining how to use several portlet frameworks are available online.
The following instructions will help you get your development environment ready for working with the source code. These instructions are specific to setting up for deployment to Orion server and Tomcat 5.5 developing with Java JDK 1.5. Liferay Portal is compatible with Java 1.4 also and a wide array of application servers and containers. You will need to adjust your development environment according to your platform.
Before we can get started, the following components must be installed on your machine.
Download and install JDK 1.5.0. JDK 1.4 is also supported.
Set an environment variable called JAVA_HOME to point to your JDK directory.
Jikes is a Java compiler by IBM that is much faster than the original one provided by the JDK.
Download and unzip Jikes 1.22. If using JDK 1.4 you have to use Jikes 1.21 instead.
Set an environment variable called JIKES_HOME to point to your Jikes directory.
Add JIKES_HOME\bin to your PATH
environment variable.
Download and unzip the latest version of Ant.
Set an environment variable called ANT_HOME to point to your Ant directory.
Add ANT_HOME\bin to your PATH environment variable.
We recommend that you put all your code and configuration files into a version control system. Subversion is free and open source and can be used through a set of commands, by installing a subversion client such as SmartSVN, TortoiseSVN or through the integration mechanisms provided by most IDEs.
Portlets for Liferay can be developed using general tools or Liferay specific tools. Here is a list of the most common options:
Increasingly IDEs are providing tools for developing portlets. This is usually a good option for rapid application development, mainly if you already have the knowledge set of that tool. In this case the IDE must allow adding Liferay specific descriptors as explained in chapter 3. The result provided by the IDE must be a WAR file that can be deployed to Liferay using the method described in Chapter 4.
Using tools such as ant or maven it's not difficult to create an environment to create portlet applications that are packaged as WAR and deployed by copying that file to the autodeploy directory in a Liferay installation.
This environment provides a ready to use ant based system for developing portlets and customizing Liferay Portal in general. It is the option that gives most flexibility and access to all Liferay specific APIs. Use this environment if you want to use the portlet frameworks provided by Liferay such as JSPPortlet and StrutsPortlet described in chapter 3. For detailed information about this environment read Liferay Portal 4 - Development in the Extension Environment.
Table of Contents
Liferay Portal has two specific deployment descriptors that extend
the functionality provided by the portlet.xml file.
One of them provides the ability to use Liferay specific features and the
second one permits the configuration of the UI that will allow users to
select the portlets. The next sections describe both of them.
The file liferay-portlet.xml may be placed in
the WEB-INF directory of any portlet application to
configure Liferay Portal specific features. Following is an example of
what this file may look like:
<?xml version="1.0"?>
<!DOCTYPE liferay-portlet-app PUBLIC "-//Liferay//DTD Portlet Application 4.2.0//EN" "http://www.liferay.com/dtd/liferay-portlet-app_4_2_0.dtd">

<liferay-portlet-app>
	<portlet>
		<portlet-name>1</portlet-name>
		<struts-path>mail</struts-path>
		<preferences-unique-per-layout>false</preferences-unique-per-layout>
		<preferences-owned-by-group>false</preferences-owned-by-group>
		<use-default-template>false</use-default-template>
		<restore-current-view>false</restore-current-view>
		<maximize-edit>true</maximize-edit>
		<private-request-attributes>false</private-request-attributes>
		<render-weight>0</render-weight>
	</portlet>
...
</liferay-portlet-app>
The portlet-name element must be equal to the
portlet name specified in the portlet.xml file.
Here is a complete list of all the available options.
This option is only useful when using the Liferay StrutsPortlet framework. Suppose the struts-path value is "mail". This tells the portal that all requests with the path mail/* are considered part of this portlet's scope. Users who request paths that match mail/* will only be granted access if they also have access to this portlet. This is true for both portlet requests and regular servlet requests.
The configuration-path value is a Struts path that allows users to configure the portlet at runtime. The Struts path must reference a class that extends com.liferay.portal.struts.PortletAction.
The indexer-class value must be a class that implements
com.liferay.util.lucene.Indexer and is called
to create or update a search index for the portlet.
The scheduler-class value must be a class that implements
com.liferay.portal.job.Scheduler and is called
to schedule Quartz jobs for this portlet.
The portlet-url-class value must be a class that extends
com.liferay.portlet.PortletURLImplWrapper. Set
this class to override the default portlet URL
implementation.
The portlet-url-class value must be a class that implements
com.liferay.portal.servlet.FriendlyURLPortletPlugin.
Use this if content inside a portlet needs to have a friendly URL.
See the Message Boards portlet source code for an example of its
uses.
The portlet-data-handler-class value must be a class that
implements
com.liferay.portal.kernel.lar.PortletDataHandler
and is called when archiving tasks are run.
The smtp-message-listener-class value must be a class that
implements
com.liferay.portal.kernel.smtp.MessageListener
and is called when processing emails.
Set the preferences-company-wide value to true if the preferences for the portlet are across the entire company. Setting this value to true means the value for preferences-unique-per-layout and preferences-owned-by-group are not used. The default value is false.
For example, an administrator could set the preferences to an Announcements portlet that would save a message in the portlet's preferences. This message would then be used across all pages for that company. The portlet must not be instanceable because instanceable portlets have uniquely generated portlet ids.
The default behavior of the bundled Announcements portlet sets the instanceable value to true so that normal users cannot create company wide messages. A future release would include permissions for the edit mode versus the view mode which would allow an administrator to set the message while users would just view the message.
Set the preferences-unique-per-layout value to true if the preferences for the portlet are unique for each page. If set to false, the preferences for the portlet are shared across all pages. The default value is true.
The preferences-unique-per-layout element is used in combination with the preferences-owned-by-group element. See the comments for the preferences-owned-by-group element for more information.
Set the preferences-owned-by-group value to true if the preferences for the portlet are owned by the group when the portlet is shown in a group page. If set to false, the preferences are owned by the user at all times. The default value is true.
Suppose the Stocks portlet has preferences-unique-per-layout set to true and preferences-owned-by-group set to false. Users can set a different list of stocks for every personal page. Users can set a different list of stocks for every community page.
Suppose the Stocks portlet has preferences-unique-per-layout set to false and preferences-owned-by-group set to false. Users can set one list of stocks to be shared across all personal pages. Users can set one list of stocks to be shared across a community's set of pages.
Suppose the Stocks portlet has preferences-unique-per-layout set to true and preferences-owned-by-group set to true. Users can set a different list of stocks for every personal page. Administrators set the portlet preferences for users in a community page. Administrators can set a different list of stocks for every community page that are then shared by all users within a community.
Suppose the Stocks portlet has preferences-unique-per-layout set to false and preferences-owned-by-group set to true. Users can set one list of stocks to be shared across all personal pages. Administrators set the portlet preferences for users in a community page. Administrators can set one list of stocks to be shared by all users across a community's set of pages.
Set the use-default-template value to true if the portlet uses the default template to decorate and wrap content. Setting this to false allows the developer to own and maintain the portlet's entire outputted content. The default value is true.
The most common use of this is if you want the portlet to look different from the other portlets or if you want the portlet to not have borders around the outputted content.
Set the show-portlet-access-denied value to true if users are shown the portlet with an access denied message if they do not have access to the portlet. If set to false, users are never shown the portlet if they do not have access to the portlet. The default value is set in portal.properties.
Set the show-portlet-inactive value to true if users are shown the portlet with an inactive message if the portlet is inactive. If set to false, users are never shown the portlet if the portlet is inactive. The default value is set in portal.properties.
Set the action-url-redirect value to true if an action URL for this portlet should cause an auto redirect. This helps prevent double submits. The default value is false.
Set the restore-current-view value to true if the portlet restores to the current view when toggling between maximized and normal states. If set to false, the portlet will reset the current view when toggling between maximized and normal states. The default value is true.
Set the maximize-edit value to true if the portlet goes into the maximized state when the user goes into the edit mode. This only affects the default portal icons and not what may be programmatically set by the portlet developer. The default value is false.
Set the maximize-help value to true if the portlet goes into the maximized state when the user goes into the edit mode. This only affects the default portal icons and not what may be programmatically set by the portlet developer. The default value is false.
Set the maximize-print value to true if the portlet goes into the maximized state when the user goes into the edit mode. This only affects the default portal icons and not what may be programmatically set by the portlet developer. The default value is false.
Set the layout-cacheable flag to true if the data contained in this portlet will never change unless the layout or portlet entry is changed.
Set the instanceable value to true if the portlet can appear multiple times on a page. If set to false, the portlet can only appear once on a page. The default value is false.
Set the private-request-attributes value to true if the portlet does not share request attributes with any other portlet. The default value is true.
The default value of render-weight is 1. If set to a value less than 1, the portlet is rendered in parallel. If set to a value of 1 or greater, then the portlet is rendered serially. Portlets with a greater render weight have greater priority and will be rendered before portlets with a lower render weight.
If the ajaxable value is set to false, then render-weight is always set to 1if it is set to a value less than 1. This means ajaxable can override render-weight if ajaxable is set to false.
The default value of ajaxable is true. If set to false, then this portlet can never be displayed via Ajax.
If the add-default-resource value is set to false, and the portlet does not belong to the page but has been dynamically added, then the user will see that he does not have permissions to view the portlet. If the add-default-resource value is set to true, the default portlet resources and permissions are added to the page. The user can then view the portlet. Most portlets are harmless and can benefit from this flexibility. However, to prevent security loop holes, the default value is false.
Set the system value to true if the portlet is a system portlet that a user cannot manually add to their page. The default value is false.
Set the active value to true if the portlet is active and available to users. If set to false, the portlet will not be active or available to users. The default value is true.
This value can be changed at runtime via the Admin portlet.
Set the include value to true to if the portlet is available to the portal. If set to false, the portlet is not available to the portal. The default value is true. Portlets that are not included as part of the portal are never available to the user to be made active or inactive. As far the user knows, the portlets do not even exist in the system. This allows the Liferay developers to bundle a lot of portlets in one core package, and yet allow custom deployments to turn on or off individual portlets or sets of portlets. This follows the Siebel and Microsoft model of bundling everything in one core package, but using XML configuration or registry settings to turn on and off features or sets of features. We do not recommend that custom deployers modify the core source by removing specific portlets because this prevents an easy upgrade process in the future. The best way to turn on and off portlets is to set the include element. The advantage of this way of doing things is that it becomes very easy to deploy Liferay. All features are available in one package. The disadvantage is that by not utilizing all of the portlets, you are wasting disk space and may even take a small but static memory footprint. However, we feel that the extra disk space and memory usage is a cheap price to pay in order to provide an easy installation and upgrade path.
In addition to specifying the above parameters specific to each
portlet, the liferay-portlet.xml file can also be
used to specify role mappings and custom user attributes global to the
whole portlet application. Here is an example:
<?xml version="1.0"?>
<!DOCTYPE liferay-portlet-app PUBLIC "-//Liferay//DTD Portlet Application 4.2.0//EN" "http://www.liferay.com/dtd/liferay-portlet-app_4_2_0.dtd">

<liferay-portlet-app>
...
	<role-mapper>
		<role-name>user</role-name>
		<role-link>User</role-link>
	</role-mapper>
	<custom-user-attribute>
		<name>user.name.random</name>
		<custom-class>com.liferay.portlet.CustomUserAttributes</custom-class>
	</custom-user-attribute>
</liferay-portlet-app>
Here is a more detailed description of these elements:
The role-mapper contains two names specified by role-name and role-link. The role-name value must be a role specified in portlet.xml. The role-link value must be the name of a Liferay role that exists in the database. The role-mapper element pairs up these two values to map roles from portlet.xml to roles in the Liferay database. This is needed because Liferay roles may contain spaces whereas roles in portlet.xml cannot contain spaces. This also adds extra flexibility where the portlet vendor does not need to have any knowledge about Liferay's roles.
The custom-user-attribute contains a list of names that are
retrieved using a custom class that extends
com.liferay.portlet.CustomUserAttributes.
For a usage example, download the sample hot deployable
portlet WAR named test.war. Look for the
class
com.liferay.portlet.teststruts.TestStrutsUserAttributes
to see how it associates the custom user attribute
"user.name.test" with the value "Test Name". This class could be
modified to read custom user attributes from another datasource
that may be a database, a LDAP server, or a web service.
The interface provided to a user to select a portlet to be added to a page shows the portlets organized in categories to make it easier to find them. The file liferay-display.xml is available to portlet developers to specify how they want their portlets to be categorized. Following is an example of what this file may look like:
<display>
	<category name="category.admin">
		<portlet id="9" />
		<portlet id="40" />
		<portlet id="79" />
		<portlet id="80" />
	</category>
	<category name="category.cms">
		<category name="category.alfresco">
			<portlet id="91" />
		</category>
	</category>
...
<display>
The name of the category must be a key defined in the resource
bundle of the portlet. The value of the id attribute must be the
portlet-name as defined in the portlet.xml file.
Categories can be nested and default portal categories can be used to
add the portlet along with the bundled portlets.
Table of Contents
In the next sections, you will learn how to develop a JSR 168 portlet leveraging two frameworks offered by Liferay to make deployment easier. First you will also learn how to create a simple JSPPortlet before moving on to the more complicated StrutsPortlet.
Both of these frameworks are available through the extension
environment, so the rest of this section will assume that you already have
it installed in a directory called ext. If you need
more information about the extension environment, please read the
Liferay Portal 4 - Development in the Extension
Environment guide.
Note that by using these portlet frameworks your portlets will only work in Liferay Portal but not in other JSR-168 compliant portlets. Use them also if you need to speed your development and do not plan to deploy your portlets in other portal in the near term.
Although a JSPPortlet does little more than display content, there
is still some work that needs to be done. Let’s start by creating a new
directory called myjspportlet within
ext\ext-web\docroot\html\portlet\ext Next, open
portlet-ext.xml within
ext\ext-web\docroot\WEB-INF\.
![[Note]](images/note.png) | Note |
|---|---|
If you are using Eclipse, you may need to associate .xml files to Eclipse if your .xml files are being opened in a separate editor. You can do this by selecting Window from the menu bar and then Preferences. Expand the Workbench navigation, and click on File Associations. From there you can add *.xml as a new File type and associate it to open in Eclipse. |
Notice how the portlets are uniquely identified by their portlet-name (also referred within Liferay Portal as the portlet id). As such, you will want to create a new portlet that is an increment of the portlet name, such as EXT_2. Since we are creating a JSPPortlet, you will want the portlet-class to reference the full class name: com.liferay.portlet.JSPPortlet. For this tutorial, add the following to your portlet-ext.xml (you may find it easier to copy and paste EXT_1 and just make the necessary changes):
<portlet>
  <portlet-name>EXT_2</portlet-name>
  <display-name>My JSPPortlet</display-name>
  <portlet-class>com.liferay.portlet.JSPPortlet</portlet-class>
  <init-param>
    <name>view-jsp</name>
    <value>/portlet/ext/myjspportlet/view.jsp</value>
  </init-param>
  <expiration-cache>300</expiration-cache>
  <supports>
    <mime-type>text/html</mime-type>
  </supports>
  <portlet-info>
    <title>My JSP Portlet</title>
  </portlet-info>
  <security-role-ref>
    <role-name>Power User</role-name>
  </security-role-ref>
  <security-role-ref>
    <role-name>User</role-name>
  </security-role-ref>
</portlet>
Here is a basic summary of what each of the elements represents:
| portlet-name | The portlet-name element contains the canonical name of the portlet. Each portlet name is unique within the portlet application. |
| display-name | The display-name type contains a short name that is intended to be displayed by tools. It is used by display-name elements. The display name need not be unique. |
| portlet-class | The portlet-class element contains the fully qualified class name of the portlet. |
| init-param | The init-param element contains a name/value pair as an initialization param of the portlet. |
| expiration-cache | Expiration-cache defines expiration-based caching for this portlet. The parameter indicates the time in seconds after which the portlet output expires. -1 indicates that the output never expires. |
| supports | The supports element contains the supported mime-type. Supports also indicates the portlet modes a portlet supports for a specific content type. All portlets must support the view mode. |
| portlet-info | Portlet-info defines portlet information. |
| security-role-ref | The security-role-ref element contains the declaration of a security role reference in the code of the web application. Specifically in Liferay, the role-name references which role’s can access the portlet. (A Power User can personalize the portal, whereas a User cannot.) |
Now that you have configured your portlet-ext.xml, the next step
is to create the jsp pages. Within your /myjspportlet
directory, add a file called init.jsp.
Within this file, add the following two lines of code:
<%@ include file="/html/common/init.jsp" %>
<portlet:defineObjects />
These two lines import all the common class files and also set common variables used by each portlet. If you need to import portlet specific classes or initialize portlet specific variables, be sure to add them to their directory specific init.jsp, as opposed to the common/init.jsp.
These two lines import all the common class files and also set common variables used by each portlet. If you need to import portlet specific classes or initialize portlet specific variables, be sure to add them to their directory specific init.jsp, as opposed to the common/init.jsp.
Now, add a view.jsp. This jsp file will hold the content of your
JSPPortlet. Write “Hello [your name here]‿ within the jsp. So the
question is then, how does the portal know how to load these particular
files? If you look back at the portlet element that was added within
portlet-ext.xml, you will notice that you initialized a
view-jsp parameter as having the value
/ext/myjspportlet/view.jsp. By specifying this
init-param, you are giving the portlet a default jsp to load.
Finally, in order to be able to add your portlet to the portal, you need to define the name within Language-ext.properties by adding the following line:
javax.portlet.title.EXT_2=My JSP
      Portlet
Since you have setup the Extension Environment, you need to deploy
the changes you have made to your application server by running
ant deploy from the ext
directory.
| Note |
|---|---|
Eclipse users may use the Ant view to run ant commands. In this case just double click the deploy [default]. |
Start Tomcat again as soon as the deployment finishes. Browse to the Home tab of the portal, and in the Add Portlet to Wide Column dropdown add “My JSP Portlet‿ to your portal.
This section will take you through an example-driven tutorial on
how to develop a StrutsPortlet. It is assumed that you have an extension
environment installed in a directory called ext. It
is also assumed that you will be using Tomcat as the application
server.
The goal of this section is to create a Struts Portlet within Liferay.
Define the portlet
portlet-ext.xml
liferay-portlet-ext.xml
Define the page flow and layout
struts-config.xml
tiles-defs.xml
Create the JSP
view.jsp
What are the main differences between a JSP Portlet and a Struts Portlet?
struts-config.xml
tiles-defs.xml
Instead of forwarding directly to a JSP
struts-config.xml – define the page
flow
tiles-defs.xml – define the page
layout
Struts implements MVC. Although there are other frameworks that implement MVC, Struts is the most widely used and mature technology.
What is MVC? MVC separates the presentation code from the business logic code.
Struts provides centralized page-flow management in the form of struts-config.xml. This makes it highly scalable and allows you to modularize the coding process.
By using Struts, you will be using a number of best practices that have been built into the framework.
A page layout is typically designed using include statements. If there are 100 JSPs and the header and footer need to be swapped, all 100 JSPs need to be changed. With Tiles, a single template can be used to determine the page layout. Only the template needs to be changed, and all the pages will be updated accordingly.
A URL or URI is passed to the Controller.
The Controller determines what page should be displayed.
Example:
How does Liferay determine which JSP is displayed first?
Our starting point is portlet-ext.xml view-action
Controller  MainServlet.java
Detailed View:
Configuration files are located in this directory:
…\ext\ext-web\docroot\WEB-INF
JSPs will be placed in this directory:
…\ext\ext-web\docroot\html\portlet\ext
Add the following portlet definition to the
portlet-ext.xml file:
<portlet>
	<portlet-name>EXT_4</portlet-name>
	<display-name>Library Portlet</display-name>
	<portlet-class>com.liferay.portlet.StrutsPortlet</portlet-class>
	<init-param>
		<name>view-action</name>
		<value>/ext/library/view</value>
	</init-param>
	<expiration-cache>0</expiration-cache>
<supports>
		<mime-type>text/html</mime-type>
	</supports>
	<resource-bundle>com.liferay.portlet.StrutsResourceBundle</resource-bundle>
	<security-role-ref>
		<role-name>power-user</role-name>
	</security-role-ref>
	<security-role-ref>
		<role-name>user</role-name>
	</security-role-ref>
</portlet>
Next add the following Liferay specific info to
liferay-portlet-ext.xml:
<portlet>
	<portlet-name>EXT_4</portlet-name>
	<struts-path>ext/library</struts-path>
	<use-default-template>false</use-default-template>
</portlet>
The struts-path is used to implement security.
http://localhost:8080/c/portal/layout?p_l_id=PRI.15.1&p_p_id=EXT_4&p_p_action=1&p_p_state=maximized&p_p_mode=view&p_p_col_id=column-1&p_p_col_pos=5&p_p_col_count=6&_EXT_4_struts_action=%2Fext%2Flibrary%2Fview
struts_action=“/ext/library/view”
struts-config.xml defines the page flow
<action path="/ext/library/view" forward="portlet.ext.library.view" />
What is /ext/library/view?
portlet-ext.xml:
<init-param>
	<name>view-action</name>
	<value>/ext/library/view</value>
</init-param>
What is portlet.ext.library.view?
It is the forward that is used to look up the tiles definition.
tiles-defs.xml defines the page layout
<definition name="portlet.ext.library" extends="portlet" />

<definition name="portlet.ext.library.view" extends="portlet.ext.library">
	<put name="portlet_content" value="/portlet/ext/library/view.jsp" />
</definition>
What is portlet.ext.library.view?
From struts-config.xml
<action path="/ext/library/view" forward="portlet.ext.library.view" />
<definition name="portlet.ext.library" extends="portlet" />

<definition name="portlet.ext.library.view" extends="portlet.ext.library">
	<put name="portlet_content" value="/portlet/ext/library/view.jsp" />
</definition>
What is /portlet/ext/library/view.jsp?
For reference: portlet-ext.xml from JSP Portlet Training
	<init-param>
		<name>view-jsp</name>
		<value>/portlet/ext/jsp_portlet/view.jsp</value>
	</init-param>
For the JSP Portlet, the JSP was pointed directly from portlet-ext.xml. For Struts portlets, this is done through tiles-defs.xml
<definition name="portlet.ext.library" extends="portlet" />

<definition name="portlet.ext.library.view" extends="portlet.ext.library">
	<put name="portlet_content" value="/portlet/ext/library/view.jsp" />
</definition>
What is portlet?
Portlet is the template that will be used (portlet.jsp). See …\portal\portal-web\docroot\WEB-INF\tiles-defs.xml for more information.
What is portlet.ext.library?
portlet.ext.library extends portlet. This means that portlet.ext.library will use the portlet.jsp as its template.
portlet.ext.library.view extends portlet.ext.library. This means that portlet.ext.library.view will also use portlet.jsp for its template.
The next step is to create the JSP.
Create a directory called library here:
…\ext\ext-web\docroot\html\portlet\ext
Your directory structure should now look like this:
…\ext\ext-web\docroot\html\portlet\ext\library
Create view.jsp in the library directory:
…\ext\ext-web\docroot\html\portlet\ext\library\view.jsp
Enter “Simple Struts Portlet!” in view.jsp
Once you have finished modifying all of the files, deploy them to Tomcat.
Open up a cmd prompt.
Click Start, Run, and then type cmd.
Navigate to your ext directory and then type ant deploy.
…\ext>ant deploy
Verify that the files were deployed to Tomcat.
Go to …\tomcat\webapps\ROOT\WEB-INF
and open portlet-ext.xml,
liferay-portlet-ext.xml,
struts-config-ext.xml, and
tiles-defs-ext.xml to check that the files
were deployed correctly.
Go to
…\tomcat\webapps\ROOT\html\portlet\ext\library
and open up view.jsp to see that it was
deployed correctly.
Restart Tomcat.
Open up a new browser and type:
http://localhost:8080
LOGIN: test@liferay.com
PASSWORD: test
Click Add Content>Undefined.
Click javax.portlet.title.EXT_4.
Now that we’ve finished building the framework for our portlet, let’s move on to the next exercise. In this exercise, we will:
Create a new file called init.jsp
where we will add commonly used variables and
declarations.
Set the portlet title.
Add the portlet to a category.
Create init.jsp in the library directory:
…\ext\ext-web\docroot\html\portlet\ext\library\init.jsp
Enter the following in
          init.jsp:
	<%@ include file="/html/common/init.jsp" %>
	<p>Add commonly used variables and declarations here!</p>
What file are we including with this line?
	<%@ include file="/html/common/init.jsp" %>
…\portal\portal-web\docroot\html\common\init.jsp
This will gives us access to the Liferay tag libraries.
Add this line above “Simple Struts Portlet!” in view.jsp:
<%@ include file="/html/portlet/ext/library/init.jsp" %>
	Simple Struts Portlet!
This will give us access to the init.jsp located here:
…\ext\ext-web\docroot\html\portlet\ext\library\init.jsp
Ant deploy. You do not have to restart Tomcat.
The following should now be displayed: Add commonly used variables and declarations here! Simple Struts Portlet
Go to Language-ext.properties and add the following line:
…\ext\ext-ejb\classes\content\Language-ext.properties
javax.portlet.title.EXT_4=Library
Ant deploy and Restart Tomcat.
The portlet title will now be “Library.”
Go to liferay-display.xml and add the following line:
…\ext\ext-web\docroot\WEB-INF\liferay-display.xml
	<category name="category.test">
		<portlet id=“EXT_3" />
		<portlet id="EXT_4" />
		...
	</category>
You will now be able to select your portlet from the “Test” category.
<portlet>
	<portlet-name>EXT_4</portlet-name>
	<struts-path>ext/library</struts-path>
	<use-default-template>false</use-default-template>
</portlet>
Liferay will check the struts-path to check whether a user has the required roles to access the portlet.
Note: When you see the error message: You do not have the required roles to access this portlet.
Check to see that you have defined the roles correctly in portlet-ext.xml.
Check the <struts-path> to see if you have defined it correctly.
The goal of this section is to add an Action Class to the Struts Portlet and to display an success page.
Define the Action.
struts-config.xml
tiles-defs.xml
Update existing JSP files.
view.jsp
init.jsp
Create success and error JSP files.
error.jsp
Success.jsp
Create Action Class to process submit.
AddBookAction.java
What are the main differences between a JSP Portlet and a Struts Portlet?
JSP Portlet goes directly to a JSP
Struts Portlet has an page flow
Where does the page flow get defined?
struts-config.xml – define the page flow
tiles-defs.xml – define the page layout
struts-config.xml defines the page flow
<action path="/ext/library/view" forward="portlet.ext.library.view" />
Lets add another path to the page flow
<action path="/ext/library/add_book" type="com.ext.portlet.library.action.AddBookAction">
	<forward name="portlet.ext.library.error" path="portlet.ext.library.error" />
	<forward name="portlet.ext.library.success" path="portlet.ext.library.success" />
</action>
What is type?
Type is a Struts defined way of passing control to the AddBookAction class.
Lets look at the forward nodes:
<forward name="portlet.ext.library.error" path="portlet.ext.library.error" />
<forward name="portlet.ext.library.success" path="portlet.ext.library.success" />
What is name?
It the unique identifier for that forward node.
What is path?
This is your link to the
tiles-def.xml.
tiles-defs.xml defines the page layout
<definition name="portlet.ext.library" extends="portlet" />

<definition name="portlet.ext.library.view" extends="portlet.ext.library">
	<put name="portlet_content" value="/portlet/ext/library/view.jsp" />
</definition>
Lets add the error and success paths
<definition name="portlet.ext.library.error" extends="portlet.ext.library">
	<put name="portlet_content" value="/portlet/ext/library/error.jsp" />
</definition>

<definition name="portlet.ext.library.success" extends="portlet.ext.library">
	<put name="portlet_content" value="/portlet/ext/library/success.jsp" />
</definition>
Update init.jsp in the library
directory
…\ext\ext-web\docroot\html\portlet\ext\library\init.jsp
Remove the following:
<p>Add commonly used variables and declarations here!</p>
init.jsp should only contain this
line:
<%@ include file="/html/common/init.jsp" %>
Review: What does including this file give us?
<%@ include file="/html/common/init.jsp" %>
…\portal\portal-web\docroot\html\common\init.jsp
This will give access to the Liferay tag
          libraries.
<%@ include file="/html/portlet/ext/library/init.jsp" %>

<br/>
Add a book entry to the Library:
<br/><br/>
<form action="<portlet:actionURL windowState="<%= WindowState.MAXIMIZED.toString() %>"><portlet:param name="struts_action" value="/ext/library/add_book" /></portlet:actionURL>" method="post" name="<portlet:namespace />fm">

	Book Title:

	<input name="<portlet:namespace />book_title" size="20" type="text" value=""><br/><br/>

	<input type="button" value="Submit" onClick="submitForm(document.<portlet:namespace />fm);">
</form>
<br/>
What does “struts_action” do?
Struts_action is the ActionMapping to the struts-config.xml path.
<action path="/ext/library/add_book" type="com.ext.portlet.library.action.AddBookAction">
value="/ext/library/add_book“
This is the link to the ActionPath.
Review
What does “struts_action” connect us to?
It connects us to the struts-config.xml
success.jsp Path:
ext-web/docroot/html/portlet/ext/library/success.jsp
success.jsp Contents:
SUCCESS!
AddBookAction Class Path:
ext/ext-ejb/src/com/ext/portlet/library/action/AddBookAction.java
AddBookAction Class Contents:
package com.ext.portlet.library.action;

import javax.portlet.ActionRequest;
import javax.portlet.ActionResponse;
import javax.portlet.PortletConfig;
import javax.portlet.RenderRequest;
import javax.portlet.RenderResponse;

import org.apache.struts.action.ActionForm;
import org.apache.struts.action.ActionForward;
import org.apache.struts.action.ActionMapping;
public class AddBookAction extends PortletAction {
public void processAction(
			ActionMapping mapping, ActionForm form, PortletConfig config,
			ActionRequest req, ActionResponse res)

		throws Exception {

		String bookTitle = req.getParameter("book_title");

		if ( null == bookTitle || "".equals(bookTitle) ) {
			setForward(req, "portlet.ext.library.error");
		} else {
			setForward(req, "portlet.ext.library.success");
		}
	}

	public ActionForward render(ActionMapping mapping, ActionForm form,
		PortletConfig config, RenderRequest req, RenderResponse res)
		throws Exception {
		if (getForward(req) != null && !getForward(req).equals("")) {
			return mapping.findForward(getForward(req));
		} else {
			return mapping.findForward("portlet.ext.library.view");
		}
	}
}
Main code:
String bookTitle = req.getParameter("book_title");

if ( null == bookTitle || "".equals(bookTitle) ) {
	setForward(req, "portlet.ext.library.error");
} else {
	setForward(req, "portlet.ext.library.success");
}
Where does “book_title” come from?
It comes from to the view.jsp
form.
What is the if/else statement doing?
It is detecting if the book title was submitted.
According to the detected state, it sets the forward path.
Error forward path:
if ( null == bookTitle || "".equals(bookTitle) ) {
	setForward(req, "portlet.ext.library.error");
} else {
	setForward(req, "portlet.ext.library.success");
}
Success forward path:
if ( null == bookTitle || "".equals(bookTitle) ) {
	setForward(req, "portlet.ext.library.error");
} else {
	setForward(req, "portlet.ext.library.success");
}
Error and
Success forward path is linked to the the path in
struts-config.xml:
<forward name="portlet.ext.library.error" path="portlet.ext.library.error" />
<forward name="portlet.ext.library.success" path="portlet.ext.library.success" />
Once you have finished modifying all of the files, deploy them to Tomcat.
Open up a cmd prompt.
Click Start>Run and then type cmd.
Navigate to your ext directory and then type ant deploy.
…\ext>ant deploy
Verify that the files were deployed to Tomcat
Go to …\tomcat\webapps\ROOT\WEB-INF
and open portlet-ext.xml,
liferay-portlet-ext.xml,
struts-config-ext.xml, and
tiles-defs-ext.xml and check to see that the files
were deployed correctly.
Next, go to
…\tomcat\webapps\ROOT\html\portlet\ext\library
and open up view.jsp to see that
it was deployed correctly.
Restart Tomcat
Open up a new browser and type:
http://localhost:8080
LOGIN: test@liferay.com
PASSWORD: test
Now that we’ve finished redirecting with an action. Lets make the success page display the submitted value.
Update success.jsp to display the
submitted value.
success.jsp Path:
ext-web/docroot/html/portlet/ext/library/success.jsp
success.jsp Contents:
<%@ include file="/html/portlet/ext/library/init.jsp" %>
<%
	String bookTitle = request.getParameter("book_title");
%>
<table align="center" cellspacing="10" cellpadding="3">
<tr>
	<td style="font-weight:bold">Book Title:</td>
	<td><%= bookTitle %></td>
</tr>
</table>
Add init.jsp
<%@ include file="/html/portlet/ext/library/init.jsp" %>
This will give us access to the
init.jsp located here:
…\ext\ext-web\docroot\html\portlet\ext\library\init.jsp
Get the submitted value
String bookTitle = request.getParameter("book_title");
Display the submitted value in
success.jsp
<%= bookTitle %>
Table of Contents
Portlets may be hot deployed through a Liferay specific mechanism or deployed manually using the regular mechanism of the application server. The next sections explain both options.
Liferay allows you to easily hot deploy layout templates, JSR 168 portlets, and themes. Layout templates allow portlets to be arranged inside the constraints of custom layouts. JSR 168 portlets add functional abilities to the portal. Themes modify the look and feel of the portal. Layout templates, portlets and themes can be deployed at runtime by utilizing the hot deploy features of Liferay.
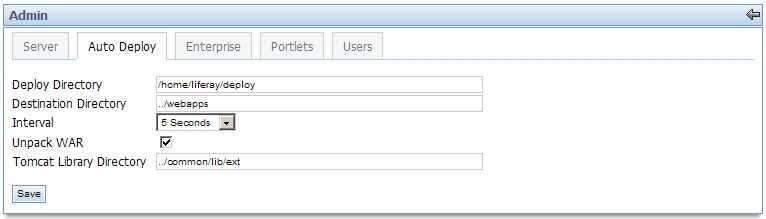
Go to the drive where you installed your server. Check to see that /home/liferay/deploy exists. If it does not, create it. You can also customize the location of this directory from the Admin portlet:
Start the server. The server will now automatically scan for *.war files.
Download one of the layout templates, sample portlets or themes to /home/liferay/deploy. Click here for a list of sample portlets, themes and layouts. (Any JSR 168 compliant portlet WAR will work as well.)
Install either JBoss+Jetty, JBoss+Tomcat, Jetty, Resin, Tomcat or WebSphere.
If you have already set up the extension environment, you can hot deploy portlets, layouts or themes by dropping them into ext/portlets, ext/layouttpl or ext/themes respectively. Then run ant deploy from that directory.
Notes: If the hot deploy feature does not work, make sure that your *.war file is a JSR 168 compliant portlet WAR, theme or layout. (You cannot use themes and layouts designed for Liferay Portal v3.6.1 or layouts and themes that were designed for other portals).
It is also possible to deploy the web application using the
mechanisms provided by the application server being used. But before
deploying it is necessary to do some massaging to the WAR file that will
allow Liferay Portal to notice that a new portlet application has been
deployed. The
com.liferay.portal.tools.PortletDeployer should be
used to do this. It is recommended that you use this tool within an ant
build script. Following is an example target that might be used to
invoke it. It has been taken from the portlets directory of the Liferay
extension environment. Adapt the paths as needed.
	<target name="deploy">
		<java
			classname="com.liferay.portal.tools.PortletDeployer"
			classpathref="project.classpath"
			fork="true"
			newenvironment="true">

				<!-- Required Arguments -->

				<jvmarg value="-Ddeployer.base.dir=./" />
				<jvmarg value="-Ddeployer.dest.dir=${app.server.deploy.dir}" />
				<jvmarg value="-Ddeployer.app.server.type=${app.server.type}" />
				<jvmarg value="-Ddeployer.portlet.taglib.dtd=${project.dir}/web-sites/liferay.com-web/docroot/WEB-INF/tld/liferay-portlet.tld" />
				<jvmarg value="-Ddeployer.unpack.war=true" />

				<!-- Optional Arguments -->

				<jvmarg value="-Ddeployer.tomcat.lib.dir=${app.server.tomcat.lib.global.dir}" />

				<!-- Dependent Libraries -->

				<arg value="${project.dir}/lib/util-bridges.jar" />
				<arg value="${project.dir}/lib/util-java.jar" />
				<arg value="${project.dir}/web-sites/liferay.com-web/docroot/WEB-INF/lib/util-taglib.jar" />

				<!-- Specific WARs -->

				<arg line="${deploy.specific.wars}" />
		</java>
	</target>
Table of Contents
Portlet applications may invoke the services provided by Liferay Portal by using the portal-client.jar client library.
It is also possible to use Liferay Service Builder to develop your portlets using the same service oriented architecture that Liferay Portal is based on.
The following sections describe the most important services that can be used. Refer the documentation in the public Liferay wiki for more information
The Permissions service is provided by Liferay Portal to developers to write security related functionality in their own portlets. Currently this functionality is only provided for portlets developed within the Liferay sources or through the extension environment.
Fine grain permissioning is one of the main new features of Liferay Portal 4. Developers can now implement access security into their custom portlets, giving administrators and users a lot more control over their portlets and contents. This document will provide a reference for implementing this new security feature into their custom portlets. Developers should first read the Security and Permissions section of the Liferay User Guide before continuing with this document.
Adding fine grain permissioning to custom portlets consists of four main steps (also known as DRAC):
Define all resources and their permissions.
For all the resources defined in step 1, register them into the permission system. This is also known simply as “adding resources.”
Associate the necessary permissions to these resources.
Check permission before returning resources.
In this section, each of the four main steps in adding Liferay’s security feature into custom portlets (built on top of the Liferay portal) will be explained. The following are two definitions that are important to remember.
A generic term for any object represented in the portal. Example of resources includes portlets (e.g., Message Boards, Calendar, etc.), Java classes (e.g., Message Board Topics, Calendar Events, etc.), and files (e.g., documents, images, etc.)
An action acting on a resource. For example, the view in “viewing the calendar portlet” is defined as a permission in Liferay.
Keep in mind that the permission for a portlet resource is implemented a little differently from the other resources such as Java classes and files. In each of the subsections below, the permission implementation for the portlet resource is explained first, then the model (and file) resource.
For your custom portlet, Liferay portal needs to know whether
there are resources that require permission and whether there are
custom permissions. The default configuration is encapsulated in an
XML file found in the
portal/portal-ejb/classes/resource-actions
directory, you might use it as a reference to create a similar file
for your portlet. If your portlet only needs the view and the
configuration permission, and that the portlet doesn’t use any
models with permission, then you do not need to create this XML
file. The reason is that all portlets in Liferay automatically
inherit these permissions. However, if your portlet does have custom
permission and/or uses models that have custom permissions, then you
will need to create an XML file defining the resources and actions.
Let’s take a look at blogs.xml in
portal/portal-ejb/classes/resource-actions and
see how the blogs portlet defined these resources and
actions:
<?xml version="1.0"?>

<resource-action-mapping>
	<portlet-resource>
		<portlet-name>33</portlet-name>
		<supports>
			<action-key>ADD_ENTRY</action-key>
			<action-key>CONFIGURATION</action-key>
			<action-key>VIEW</action-key>
		</supports>
		<community-defaults>
			<action-key>VIEW</action-key>
		</community-defaults>
		<guest-defaults>
			<action-key>VIEW</action-key>
		</guest-defaults>
		<guest-unsupported>
			<action-key>ADD_ENTRY</action-key>
		</guest-unsupported>
	</portlet-resource>
	<model-resource>
		<model-name>com.liferay.portlet.blogs.model.BlogsCategory</model-name>
		<portlet-ref>
			<portlet-name>33</portlet-name>
		</portlet-ref>
		<supports>
			<action-key>DELETE</action-key>
			<action-key>PERMISSIONS</action-key>
			<action-key>UPDATE</action-key>
			<action-key>VIEW</action-key>
		</supports>
		<community-defaults>
			<action-key>VIEW</action-key>
		</community-defaults>
		<guest-defaults>
			<action-key>VIEW</action-key>
		</guest-defaults>
		<guest-unsupported>
			<action-key>UPDATE</action-key>
		</guest-unsupported>
	</model-resource>
	<model-resource>
		<model-name>com.liferay.portlet.blogs.model.BlogsEntry</model-name>
		<portlet-ref>
			<portlet-name>33</portlet-name>
		</portlet-ref>
		<supports>
			<action-key>ADD_COMMENT</action-key>
			<action-key>DELETE</action-key>
			<action-key>PERMISSIONS</action-key>
			<action-key>UPDATE</action-key>
			<action-key>VIEW</action-key>
		</supports>
		<community-defaults>
			<action-key>VIEW</action-key>
		</community-defaults>
		<guest-defaults>
			<action-key>VIEW</action-key>
		</guest-defaults>
		<guest-unsupported>
			<action-key>UPDATE</action-key>
		</guest-unsupported>
	</model-resource>
</resource-action-mapping>
In the XML, the first thing defined is the portlet itself.
Right under the root element
<resource-action-mapping><portlet-resource>. In this element, we
define the portlet name, which is 33 in our case. Next, we list
all the actions this portlet supports under the
<supports>ADD_ENTRY), configure blogs portlet settings
(CONFIGURATION), and view the blogs itself
(VIEW). Each of these supported permissions
is within its own <action-key> tag.
After we’ve defined all the actions that require a check, we move
on to define some of the default permission settings. The
community-defaults tag defines what actions
are permitted by default for this portlet on the community (group)
page the portlet resides. Put it another way, what should a user
that has access to the community this portlet resides be able to
do minimally? For the blogs portlet, a user with access to the
community containing the blogs portlet should be able to view it.
Likewise, the guest-defaults tag defines what
actions are permitted by default to guests visiting a layout
containing this portlet. So if a guest has access to the community
page that contains a blogs portlet, the guest should, at the very
least, be able to view the portlet according to
blogs.xml (not necessarily the content of the
portlet). Otherwise, the guest will see an error message within
the portlet. Depending on your custom portlet, you may add more
actions here that make sense. The guest-unsupported
tag contains actions that a visiting guest should never
be able to do. For example, the guest visiting the blogs portlet
should never be able to add a blog entry since the blog belongs to
either a user or a group of users. So even if a user wants to
grant guests the ability to add a blog entry to her blog, there is
no way for her to grant that permission because the
blogs.xml doesn’t permit such an action for
guests.
After defining the portlet as a resource, we move on to
define models within the portlet that also require access check.
The model resource is surrounded by the
<model-resource> tag. Within this tag,
we first define the model name. This must be the fully qualified
Java class name of the model. Next we define the portlet name that
this model belongs to under the portlet-ref
tag. Though unlikely, a model can belong to multiple
portlets, which you may use multiple
<portlet-name> tags to define. Similar
to the portlet resource element, the model resource element also
allows you to define a supported list of actions that require
permission to perform. You must list out all the performable
actions that require a permission check. As you can see for a blog
entry, a user must have permission in order to add comments to an
entry, delete an entry, change the permission setting of an entry,
update an entry, or simply to view an entry. The
<community-defaults> tag, the
<guest-defaults> tag, and the
<guest-unsupported> tag are all similar
in meaning to what’s explained for portlet resource in section
3.1.1.
After defining your permission scheme for your custom
portlet, you then need to tell Liferay the location of this file.
For Liferay core, the XML file would normally reside in
portal/portal-ejb/classes/resource-actions
and a reference to the file would appear in the
default.xml file. For the extension
environment, the recommended setup is to put your XML file in
ext/ext-ejb/classes/resource-actions. Create
a file called default-ext.xml and model it
after the default.xml file. Add all your
custom resource-action XML files in the
default-ext.xml file. Then copy the property
resource.actions.configs found in
portal.properties and paste it into
portal-ext.properties. Lastly, add a comma to
the end of the property value and then add the path to your
default-ext.xml file. (i.e.
resource.actions.configs=resource-actions/default.xml,resource-actions/default-ext.xml)
Below is an example of the default.xml
file.
<?xml version="1.0"?>

<resource-action-mapping>
	<resource file="resource-actions/portal.xml" />
	<resource file="resource-actions/blogs.xml" />
	<resource file="resource-actions/bookmarks.xml" />
	<resource file="resource-actions/calendar.xml" />
	<resource file="resource-actions/communities.xml" />
	<resource file="resource-actions/documentlibrary.xml" />
	<resource file="resource-actions/imagegallery.xml" />
	<resource file="resource-actions/journal.xml" />
	<resource file="resource-actions/messageboards.xml" />
	<resource file="resource-actions/polls.xml" />
	<resource file="resource-actions/shopping.xml" />
	<resource file="resource-actions/wiki.xml" />
</resource-action-mapping>
After defining resources and actions, the next task is to
write code that adds resources into the permissioning system. A lot
of the logic to add resources is encapsulated in the
ResourceLocalServiceImpl class. So adding
resources is as easy as calling the add resource method in
ResourceLocalServiceUtil class.
public void addResources(
	String companyId, String groupId, String userId, String name,
	String primKey, boolean portletActions,
	boolean addCommunityPermissions, boolean addGuestPermissions);
For all the Java objects that require access permission, you
need to make sure that they are added as resources every time a new
one is created. For example, every time a user adds a new entry to
her blog, the addResources(…) method is called
to add the new entry to the resource system. Here’s an example of
the call from the BlogsEntryLocalServiceImpl
class.
ResourceLocalServiceUtil.addResources(
	entry.getCompanyId(), entry.getGroupId(), entry.getUserId(),
	BlogsEntry.class.getName(), entry.getPrimaryKey().toString(),
	false, addCommunityPermissions, addGuestPermissions);
The parameters companyId,
groupId, and userId should
be self explanatory. The name parameter is the
fully qualified Java class name for the resource object being added.
The primKey parameter is
the primary key of the resource object. As for the
portletActions parameter, set this to true if
you’re adding portlet action permissions. In our example, we set it
to false because we’re adding a model resource,
which should be associated with permissions related to the model
action defined in blogs.xml. The
addCommunityPermissions and the
addGuestPermissions parameters are inputs from
the user. If set to true, ResourceLocalService
will then add the default permissions to the current community group
and the guest group for this resource respectively.
If you would like to provide your user the ability to choose
whether to add the default community permission and the guest
permission for the resources within your custom portlet, Liferay
has a custom JSP tag you may use to quickly add that
functionality. Simply insert the
<liferay-ui:input-permissions /> tag
into the appropriate JSP and the checkboxes will show up on your
JSP. Of course, make sure the tag is within the appropriate
<form> tags.
To prevent having a lot of dead resources taking up space in
the Resource_ database table, you must
remember to remove them from the Resource_
table when the resource is no longer applicable. Simply
call the deleteResource(…) method in
ResourceLocalServiceUtil. Here’s an example
of a blogs entry being removed:
ResourceLocalServiceUtil.deleteResource(
	entry.getCompanyId(), BlogsEntry.class.getName(),
	Resource.TYPE_CLASS, Resource.SCOPE_INDIVIDUAL,
	entry.getPrimaryKey().toString());
On the portlet level, no code needs to be written in order to have the permission system work for your custom portlet. Your custom portlet will automatically have all the permission features. If you’ve defined any custom permissions (supported actions) in your portlet-resource tag in section 3.1, those are automatically added to a list of permissions and users can readily choose them. Of course, for your custom permissions to have any value, you’ll need to show or hide certain functionality in your portlet. You can do that by checking the permission first before performing the intended functionality. This will be covered in section 3.4.
In order to allow a user to set permissions on the model
resources, you will need to expose the permission interface to the
user. This can be done by adding two Liferay UI tag to your JSP.
The first one is the
<liferay-security:permissionsURL> tag
which returns a URL that takes the user to the page to configure
the permission settings. The second tag is the
<liferay-ui:icon> tag that shows a
permission icon to the user. Below is an example found in the file
view_entry_content.jsp.
<liferay-security:permissionsURL
	modelResource="<%= BlogsEntry.class.getName() %>"
	modelResourceDescription="<%= entry.getTitle() %>"
	resourcePrimKey="<%= entry.getPrimaryKey().toString() %>"
	var="entryURL"
/>

<liferay-ui:icon image="permissions" url="<%= entryURL %>" />
The attributes you need to provide to the first tag are
modelResource,
modelResourceDescription,
resourcePrimKey, and var. The
modelResource attribute is the fully
qualified Java object class name. It then gets translated in
Language.properties to a more readable name
(underlined in red in figure 3.3.2.1).
model.resource.com.liferay.portlet.blogs.model.BlogsEntry=Entry
As for the modelResourceDescription
attribute, you can pass in anything that best describes this model
instance. In the example, the blogs title was passed in, which is
reflected in figure 3.3.2.1 with the blue underline. The
resourcePrimKey attribute is simply the
primary key of your model instance. The var
attribute is the variable name this URL String will get
assigned to. This variable is then passed to the
<liferay-ui:icon> tag so the permission
icon will have the proper URL link. There’s also an optional
attribute redirect that’s available if you
want to override the default behavior of the upper right arrow
link shown in figure 3.3.2.1. That is all you need to do to enable
users to configure the permission settings for model
resources!!
The last major step to implementing permission to your custom portlet is to check permission. This may be done in a couple of places. For example, your business layer should check for permission before deleting a resource, or your user interface should hide a button that adds a model (e.g., a calendar event) if the user does not have permission to do so.
Similar to the other steps, the default permissions for the
portlet resources are automatically checked for you. You do not
need to implement anything for your portlet to discriminate
whether a user is allowed to view or to configure the portlet
itself. However, you do need to implement any custom permission
you have defined in your resource-actions XML file. In the blogs
portlet example, one custom supported action is
ADD_ENTRY. There are two places in the source
code that check for this permission. The first one is in the file
view_entries.jsp. The presence of the add
entry button is contingent on whether the user has permission to
add entry (and also whether the user is in tab one).
<%
boolean showAddEntryButton = tabs1.equals("entries") && PortletPermission.contains(permissionChecker, plid, PortletKeys.BLOGS, ActionKeys.ADD_ENTRY);
%>
The second place that checks for the add entry permission is
in the file BlogsEntryServiceImpl. (Notice
the difference between this file and the
BlogsEntryLocalServiceImpl.) In the
addEntry(…) method, a call is made to check
whether the incoming request has permission to add entry.
PortletPermission.check(
	getPermissionChecker(), plid, PortletKeys.BLOGS,
	ActionKeys.ADD_ENTRY);
If the check fails, it throws a
PrincipalException and the add entry request
aborts. You’re probably wondering what the PortletPermission class
and the PermissionChecker class do. Let’s take a look at these two
classes.
The PermissionChecker class has a method called
hasPermission(…) that checks whether a user
making a resource request has the necessary access permission.
If the user is not signed in (guest user), it checks for guest
permissions. Otherwise, it checks for user permissions. This
class is available to you in two places. First in your business
logic layer, you can obtain an instance of the PermissionChecker
by calling the getPermissionChecker()
method inside your ServiceImpl class. This
method is available because all ServiceImpl
(not LocalServiceImpl) extends the
PrincipalBean class, which implements the
getPermissionChecker() method. The other
place where you can obtain an instance of the PermissionChecker
class is in your JSP files. If your JSP file contains the
portlet tag <portlet:defineObjects />
or includes another JSP file that does, you’ll have an instance
of the PermissionChecker class available to you via the
permissionChecker variable. Now that you
know what the PermissionChecker does and
how to obtain an instance of it, let’s take a look at Liferay’s
convention in using it.
PortletPermission is a helper class
that makes it easy for you to check permission on portlet
resources (as oppose to model resources, covered later in
section 3.4.2). It has two static methods called
check(…) and another two called
contains(…). They are all essentially the
same. The two differences between them are:
Only one check(…) method and one
contains(…) method take in the portlet
layout ID variable (plid).
The check(…) methods throw a new
PrincipalException if user does not
have permission, and the contains(…)
methods return a boolean indicating whether user
has permission.
The contains(…) methods are meant to
be used in your JSP files since they return a boolean instead of
throwing an exception. The check(…) methods are meant to be
called in your business layer (ServiceImpl). Let’s revisit the
blogs portlet example below. (The addEntry(…) method is found in
BlogsEntryServiceImpl.)
public BlogsEntry addEntry(
		String plid, String categoryId, String[] tags, String title,
		String content, int displayDateMonth, int displayDateDay,
		int displayDateYear, int displayDateHour, int displayDateMinute,
		boolean addCommunityPermissions, boolean addGuestPermissions)
throws PortalException, SystemException {

	PortletPermission.check(
		getPermissionChecker(), plid, PortletKeys.BLOGS,
		ActionKeys.ADD_ENTRY);

	return BlogsEntryLocalServiceUtil.addEntry(
		getUserId(), plid, categoryId, tags, title, content,
		displayDateMonth, displayDateDay, displayDateYear, displayDateHour,
		displayDateMinute, addCommunityPermissions, addGuestPermissions);
}
Before the addEntry(…) method calls
BlogsEntryLocalServiceUtil.addEntry(…) to
add a blogs entry, it calls
PortletPermission.check(…) to validate user
permission. If the check fails, a
PrincipalException is thrown and an entry
will not be added. Note the parameters passed into the method.
Again, the getPermissionChecker() method is
readily available in all ServiceImpl
classes. The plid variable is passed into
the method by its caller (most likely from a
PortletAction class).
PortletKeys.BLOGS is just a static
String indicating that the permission check
is against the blogs portlet.
ActionKeys.ADD_ENTRY is also a static
String to indicate the action requiring the permission check.
You’re encouraged to do likewise with your custom portlet names
and custom action keys.
Whether you need to pass in a portlet layout ID (plid) depends on whether your custom portlet supports multiple instances. Let’s take a look at the message board portlet for example. A community may need three separate page layouts, each having a separate instance of the message board portlet. Only by using the portlet layout ID will the permission system be able to distinguish the three separate instances of the message board portlet. This way, permission can be assigned separately in all three instances. Though in general, most portlets won’t need to use the portlet layout ID in relation to the permission system.
Since the ServiceImpl class extends
the PrincipalBean class, it has access to
information of the current user making the service request.
Therefore, the ServiceImpl class is the
ideal place in your business layer to check user permission.
Liferay’s convention is to implement the actual business logic
inside the LocalServiceImpl methods, and
then the ServiceImpl calls these methods
via the LocalServiceUtil class after the
permission check completes successfully. Your
PortletAction classes should make calls to
ServiceUtil (wrapper to
ServiceImpl) guaranteeing that permission
is first checked before the request is fulfilled.
Checking model resource permission is very similar to checking portlet resource permission. The only major difference is that instead of calling methods found in the PortletPermission class mention previously, you need to create your own helper class to assist you in checking permission. The next section will detail how this is done.
It is advisable to have a helper class to help check
permission on your custom models. This custom permission class
is similar to the PortletPermission class but is tailored to
work with your custom models. While you can implement this class
however you like, we encourage you to model after the
PortletPermission class, which contains four static methods.
Let’s take a look at the
BlogsEntryPermission class.
public class BlogsEntryPermission {

	public static void check(
			PermissionChecker permissionChecker, String entryId,
			String actionId)
		throws PortalException, SystemException {

		if (!contains(permissionChecker, entryId, actionId)) {
			throw new PrincipalException();
		}
	}

	public static void check(
			PermissionChecker permissionChecker, BlogsEntry entry,
			String actionId)
		throws PortalException, SystemException {

		if (!contains(permissionChecker, entry, actionId)) {
			throw new PrincipalException();
		}
	}

	public static boolean contains(
			PermissionChecker permissionChecker, String entryId,
			String actionId)
		throws PortalException, SystemException {

		BlogsEntry entry = BlogsEntryLocalServiceUtil.getEntry(entryId);

		return contains(permissionChecker, entry, actionId);
	}

	public static boolean contains(
			PermissionChecker permissionChecker, BlogsEntry entry,
			String actionId)
		throws PortalException, SystemException {

		return permissionChecker.hasPermission(
			entry.getGroupId(), BlogsEntry.class.getName(),
			entry.getPrimaryKey().toString(), actionId);
	}
}
Again, the two check(…) methods are meant to be called in your business layer, while the two contains(…) methods can be used in your JSP files. As you can see, it’s very similar to the PortletPermission class. The two notable differences are:
Instead of having the portletId
as one of the parameters, the methods in this custom class
take in either an entryId or a
BlogsEntry object.
None of the methods need to receive the portlet layout
ID (plid) as a parameter. (Your custom
portlet may choose to use the portlet layout ID if need
be.)
Let’s see how this class is used in the blogs portlet code.
public BlogsEntry getEntry(String entryId) throws PortalException, SystemException {

	BlogsEntryPermission.check(
		getPermissionChecker(), entryId, ActionKeys.VIEW);

	return BlogsEntryLocalServiceUtil.getEntry(entryId);
}
In the BlogsEntryServiceImpl class is
a method called getEntry(…). Before this
method returns the blogs entry object, it calls the custom
permission helper class to check permission. If this call
doesn’t throw an exception, the entry is retrieved and returned
to its caller.
<c:if test="<%= BlogsEntryPermission.contains(permissionChecker, entry, ActionKeys.UPDATE) %>">
	<portlet:renderURL windowState="<%= WindowState.MAXIMIZED.toString() %>" var="entryURL">
		<portlet:param name="struts_action" value="/blogs/edit_entry" />
		<portlet:param name="redirect" value="<%= currentURL %>" />
		<portlet:param name="entryId" value="<%= entry.getEntryId() %>" />
	</portlet:renderURL>

	<liferay-ui:icon image="edit" url="<%= entryURL %>" />
</c:if>
In the view_entry_content.jsp file,
the BlogsEntryPermission.contains(…) method
is called to check whether or not to show the edit button.
That’s all there is to it!
Let’s review what we’ve just covered. Implementing permission
into your custom portlet consists of four main steps. First step is to
define any custom resources and actions. Next step is to implement
code to register (or add) any newly created resources such as a
BlogsEntry object. The third step is to provide
an interface for the user to configure permission. Lastly, implement
code to check permission before returning resources or showing custom
features. Two major resources are portlets and Java objects. There is
not a lot that needs to be done for the portlet resource to implement
the permission system since Liferay Portal has a lot of that work done
for you. You mainly focus your efforts on any custom Java objects
you’ve built. You’re now well on your way to implement security to
your custom Liferay portlets! For other user guides, please visit the
Liferay
documentation page
If you’re wondering how the Liferay user roles, community
roles, and organization / location roles should be implemented in
your custom portlet, this brief section will address that. The short
answer is, nothing needs to be developed specifically for user,
community, and organization / location roles to work with your
custom portlets. Liferay’s permission system has all that provided
for you. When the hasUserPermission(…) method
is called within the PermissionChecker class,
Liferay checks all the roles the current user has, whether they’re
organization / location roles, community roles, or user
roles.
Here’s a brief outline of how you can use your own security system in Liferay.
Create your own PermissionChecker
class that extends Liferay’s
PermissionChecker class.
Register this new class in
portal.properties (or
portal-ext.properties for the EXT
environment) under the permissions.checker
property.
Override the hasUserPermission(…)
method and the hasGuestPermission(…) method
with your own calls to your permission system.
You can call the setValues(…) method
to pull in parameters from the request object that your
permission checker might need (e.g., userId,
projected, etc).
You can call the resetValues(…)
method to wipe out old parameters.
Override the isAdmin(…)
method.
Reviewing how Liferay stores all the permission information in the database may help you gain a better understanding to the entire permission system.
The resource_ table contains all the
registered resources outlined in section 3.2.
Every possible secure action that can be done to a
resource will result in a row in the permission_
table. For example, a BlogsEntry
resource may have a row in permission_ for
the view action, and another for the update action.
Whether a user has permission to a resource depends on the
roles the user has, or the community (groups) and organization
the user is in (green tables). If those roles or groups contain
the needed permissionId in the permissions
table (in blue), then the user has access to the
resource.
The User service allows the management of the portal user and it's communities (aka Groups), Roles and UserGroups. It can be accessed through the static methods of UserServiceUtil. Following is a description of it's most important methods:
	public static com.liferay.portal.model.User addUser(
		java.lang.String companyId, boolean autoUserId,
		java.lang.String userId, boolean autoPassword,
		java.lang.String password1, java.lang.String password2,
		boolean passwordReset, java.lang.String emailAddress,
		java.util.Locale locale, java.lang.String firstName,
		java.lang.String middleName, java.lang.String lastName,
		java.lang.String nickName, java.lang.String prefixId,
		java.lang.String suffixId, boolean male, int birthdayMonth,
		int birthdayDay, int birthdayYear, java.lang.String jobTitle,
		java.lang.String organizationId, java.lang.String locationId,
		boolean sendEmail)
		throws com.liferay.portal.PortalException,
			com.liferay.portal.SystemException, java.rmi.RemoteException;
Add a new user inserting in its profile the provided information
	public static com.liferay.portal.model.User updateUser(
		java.lang.String userId, java.lang.String password,
		java.lang.String emailAddress, java.lang.String languageId,
		java.lang.String timeZoneId, java.lang.String greeting,
		java.lang.String resolution, java.lang.String comments,
		java.lang.String firstName, java.lang.String middleName,
		java.lang.String lastName, java.lang.String nickName,
		java.lang.String prefixId, java.lang.String suffixId, boolean male,
		int birthdayMonth, int birthdayDay, int birthdayYear,
		java.lang.String smsSn, java.lang.String aimSn, java.lang.String icqSn,
		java.lang.String jabberSn, java.lang.String msnSn,
		java.lang.String skypeSn, java.lang.String ymSn,
		java.lang.String jobTitle, java.lang.String organizationId,
		java.lang.String locationId)
		throws com.liferay.portal.PortalException,
			com.liferay.portal.SystemException, java.rmi.RemoteException;
Update a user's profile with the provided information.
	public static void addGroupUsers(java.lang.String groupId,
		java.lang.String[] userIds)
		throws com.liferay.portal.PortalException,
			com.liferay.portal.SystemException, java.rmi.RemoteException;
Add a set of users to a give community (aka Group) identified by the groupId.
	public static void addRoleUsers(java.lang.String roleId,
		java.lang.String[] userIds)
		throws com.liferay.portal.PortalException,
			com.liferay.portal.SystemException, java.rmi.RemoteException;
Add a set of users to a give Role identified by the roleId.
For more information check the Portal Javadocs.
After reading this document you should have a clear idea of what you need to develop and deploy a portlet in Liferay. It has also covered the most important resources and services that Liferay provides to portlet developers.
After reading this document we recommend reading more articles and information about portlet development and/or attend one of the available training sessions.