Table of Contents
The Document Library provides a centralized repository for various document types (e.g., .PDF, .DOC, .XLS, etc.) to be stored and assigns a unique URL to each of them. A company's intranet running Liferay Portal can then be able to post internal documentation (e.g., reimbursement forms, charitable donations policies, etc.) for access by its employees. Alternatively, since each document has its own URL, a portlet on your company's public website may display a list of PDF files of quarterly newsletters and their download links:

The Document Library supports multiple repositories that can be set with different access roles. Also, the documents in the repository are version-controlled, allowing a user to retrieve any particular revision that has been stored on the system.
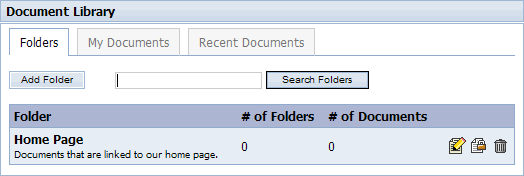
To add a document to an empty Document Library portlet, you must first add a folder. Click the Add Folder button.

Give a name and description to the folder. The permissions for the folder determine what users can do. This is further explained in Liferay Portal 4 - Portal Administration Guide. Click Save. The Document Library screen will appear.

The new folder will appear in the Document Library. To add a document to that folder, click on the folder name.
You can either add more folders to further divide your documents into more specific categories or you can add a document to the current folder. The breadcrumb (see section 5.1.) at the top of the portlet shows that you would be adding a document to the Home Page folder. In this use case, we will add a document. Click Add Document.

Use the Browse button to find the document you want to upload to the Document Library. There is a cap of 300k on uploaded documents. After uploading the document, enter a title and description for the document. Click Save when finished. After saving, you can choose to lock the document to prevent anyone from editing this document. The default lock time is one day.

Use the breadcrumb to return to the Home Page folder (for this use case) where you will see the document you have just added. Clicking on the document will allow you to open or save it. If you have the proper permissions, you can delete the document from the Document Library by clicking the Delete icon (
 ).
).
To reference a document in the Document Library, you must first find which folder the document is contained in. Using the same use case as in 2.1.1, we see that the W-4.pdf document is located in the Home Page folder, as shown by the breadcrumb.

Right click on the document name, then select Properties to view its Address (URL). You can then either highlight the entire URL or click anywhere over the URL area and press Ctrl+A to select the entire link. Keep in mind that the URL is long. If you use the highlight method, you must hightlight the entire URL. You can then copy this link and reference it anywhere within the portal. You can even reference this document outside of the portal as long as your portal is running and the document is still in the repository. Refer to figure below.
