To add a structure, first click on the Structures tab in the Journal Portlet, and then click on the Add button. The structure creation page will be displayed.

Give your structure an ID or have it auto-generate one. It is recommended that you choose your own ID so that the structure will be easier to identify when associating it with templates and articles. Please note that the ID must be unique. The convention is to separate words in the ID with a hyphen, e.g., “BASIC-STRUCTURE-NAME." The structure ID can not be changed once your structure has been saved, so be sure that the ID is exactly how you would want it to appear.
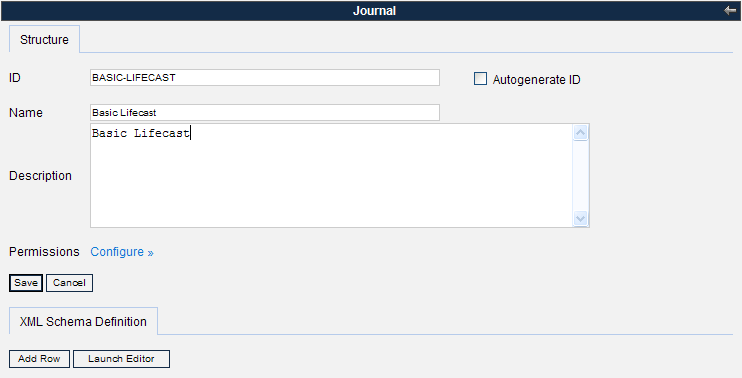
Give your structure a clear name and description because these fields are also used for identification of the structure.
To start adding fields to the structure, click the Add Row button. This will show a new field where you can enter a name and a content type for this field (image, text, boolean flag, etc.). Those comfortable with XML or HTML can edit the XSL directly by clicking Launch Editor. Both methods of adding/editing elements will work, and both can be used in the same session. One simple approach is to add a few elements using the GUI and then to edit the XML directly (which will contain the syntax for the already added elements and can be copy-pasted).

Keep in mind that all names of fields must be one word—a description such as “Content Title" would not be allowed. To name a field using multiple words, put a dash in between words to prevent confusion, such as “content-title."
From the Selection List and Multi-Selection List, press the
 button to add extra options to the lists,
and use the
button to add extra options to the lists,
and use the  and
and  buttons to move the options up and down
on the display for the article.
buttons to move the options up and down
on the display for the article.Once all the fields have been added to the structure, click the Save button, located above the XML Schema Defintion tab. If no error messages appear, the structure has now been created and can be associated to templates.
To edit an existing structure, go to the Structures tab. There you will see a list of existing structures with pagination and an area to search for structures by ID, name, and/or description. You can use either method to locate the structure you wish to edit. Before editing the actual structure, it is advisable to view the associated articles and templates because they can potentially be affected by any changes made to your structure. You can view associated articles (
 ) and templates (
 ) by clicking on their respective icons.
When you are done viewing associated articles and templates,
find the structure again using either method above. Click on the
Structure ID, description, or the Edit icon (
) by clicking on their respective icons.
When you are done viewing associated articles and templates,
find the structure again using either method above. Click on the
Structure ID, description, or the Edit icon ( ) to display the editing screen, shown
below.
) to display the editing screen, shown
below.
In the edit screen, you can edit anything in the structure except for the structure ID, which can not be changed once the structure has been created.
Editing the name and description will not affect other features of the Journal portlet, but adding, deleting, and modifying fields will affect the templates and articles that are associated with the structure. It is advisable to backup the current XML file first by clicking the Download button so that it will be easy to revert to your old structure if necessary.
If you add fields, the articles associated will have extra fields for additional content. If you delete fields, associated content and articles will be deleted. For example, notice that the structure above has a tltle field. Now look at the article below that uses a structure that has something in that field.
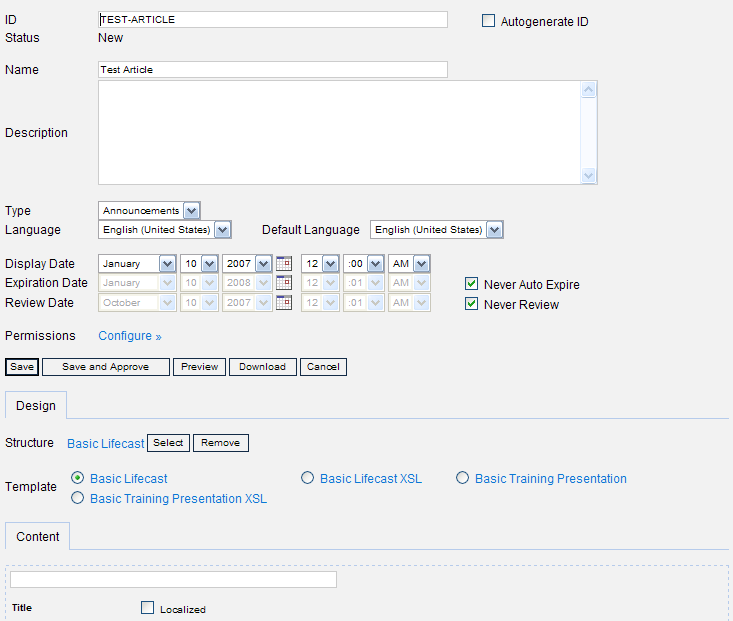
When you delete the field from the structure (title in this case), either by deleting the row or deleting it through the editor, the associated article will not show the field.
So when you delete fields, be certain that associated articles no longer need those fields. This also applies if you rename a field; there will be a new field inside the article with that name and field type, but the content that was in the old field will be gone. For an article to display properly, the template layout must also be changed when fields are added or modified.
When all changes have been made, click the Save button to save your changes.
To delete a structure, you must first delete all articles and disassociate or delete all templates associated with that structure. First search for the structure you wish to delete, such as ABOUTUS-NEWS, using the same method as step 1 of section 3.2.2. To delete all articles, first click the View Articles icon (
), which takes you to a view of all
associated articles, shown below.
The screen above shows what filter was used to find the articles. Edit or delete all of these articles. To delete, click the Delete icon (
 ) next to the article you wish to
delete.
) next to the article you wish to
delete.Once all articles have been edited or deleted, go back to the Structures tab and find the structure you wish to delete. Click on the View Templates icon (
) to take you to a view of all associated
templates.Edit or delete all of these templates. To delete, click the Delete icon (
) next to the template you wish to delete.
To edit, begin by clicking the Edit icon () next to each template. Inside the edit
template screen, change the structure by clicking the Select button next to the Structure field
so that it no longer uses the structure you wish to delete.
Click the Save button when you
have selected a new structure for the template to be associated
with.Once all articles and templates have been disassociated from the structure, search for the structure once again in the Structures tab, then click the Delete icon (
) next to that structure.